
Tags in Gymdesk are an internal labeling tool, visible only to managers and staff, that provide a flexible way to organize Members and Leads. They can be used to create quick reference lists and track important details that might not fit elsewhere. Tags can also be used to trigger automations that streamline follow-ups or other workflows.
Managing Tags from Settings
Go to Settings in your Main Menu
Select Members → Manage Tags
You can edit and remove tags from one central screen in Settings. This view also shows you at a glance how many leads or members are tied to each tag. If certain tags are no longer needed, you can easily remove several at once with just a click.

How to Create and Add Tags
You can create and apply tags in several ways:
1. Within a Member or Lead Profile
- Click directly on the member or lead profile you want to tag.
- Scroll to the Tags section (just above Personal Details).
- Click add (➕) under the Tags header.
- Select an existing tag from the list or create a new one.
- Click Save Tags.
2. From the Members or Leads List
- Click Select at the bottom to display checkboxes for each profile.
- Check the box next to one (or more) profiles you want to tag.
- Confirm the number of profiles selected, then click the Actions button.
- Choose Tag Members (or Leads) depending on the list you’re in.
- Enter a new tag name and press Enter to create and apply it to all selected profiles.
⚠️ Tag Visibility:
-
Lead Tags are visible in the Leads List and Lead Profiles, making them easy to quickly reference — lead tags typically capture short-term details that can shift quickly.
-
Member Tags are visible only inside Member Profiles, and are generally more stable, long-term identifiers.
3. From an Automation
In Gymdesk, automations can be used to automatically apply tags, helping keep members and leads organized without the need for manual profile updates. Each automation is triggered by an event (such as a new member sign-up or new booking), and then runs the sequence of steps you’ve defined.
4. When Creating Tasks
You can add and edit tags while creating or editing a task from Account → Tasks.
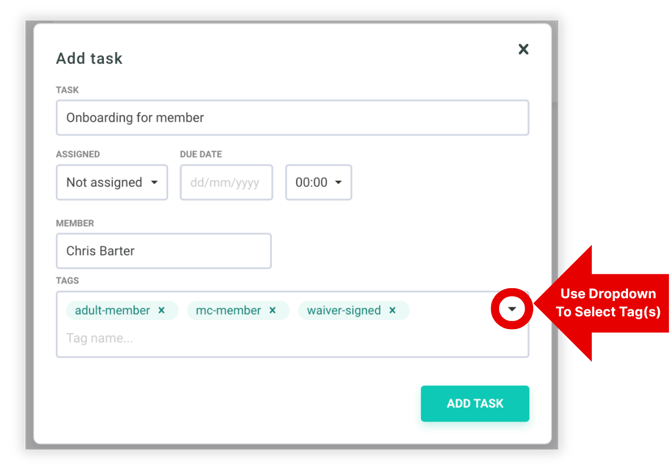
-
In the Tags field, click the dropdown arrow to select existing tags or create new ones.
-
Tags added here automatically apply to the lead or member linked to that task.
-
This allows you to organize tasks by context—for example, tagging follow-ups as “trial-booked,” “pending-payment,” or “follow-up.”
4. When Adding Tasks or Notes from a Lead Profile
You can also add tags when creating a note or task directly inside a lead profile.
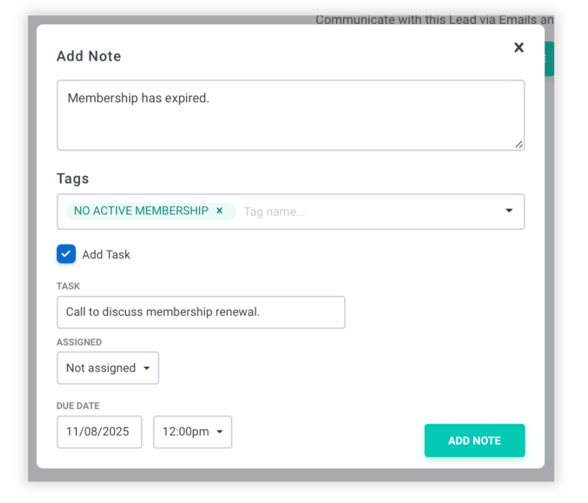
-
From the Lead Profile, click Add Note.
-
Use the Tags field to select existing tags or create new ones.
-
Tags added this way automatically appear under the profile’s Tags section.
-
This makes it easy to capture relevant context—such as “called,” “no answer,” or “interested in summer camp”—while staying within the same profile.
How to Apply Tags with Automations
Go to Marketing in your Main Menu
Select Automations → Create New Automation

-
First, Select Automation Trigger.
- Click ✎ Edit to refine the trigger’s starting conditions.
-
Next, drag the action step, Change Contact, into the sequence.
- From the dropdown menu, select Add Tag.
💡Temporary Tags
You can create a tag that automatically expires by dragging Add Delay into the sequence. Set the duration for how long you want the tag to remain active, then drag an additional Change Contact step, with Remove Tag as the action.
-
Then, enter the tag name you want to apply.
- Finally, give the automation a descriptive title and click Create Automation to save.