You can manage multiple gyms with the same account. Note that you will need the appropriate account plan that supports the amount of gyms you wish to manage, before your trial expires.
Adding a New Location
A new location can be added from the dropdown that appears when you click on the gym name or logo in the top header. Click on the "Add New Location" button, and you will be sent to the gym creation form.
Setting up a new location is similar to the gym creation process you did when you set up the account.
Switching Between Locations
To switch between location, click on the gym name or logo in the top header, and click the name of the gym you wish to manage.
Sharing Resources Between Locations
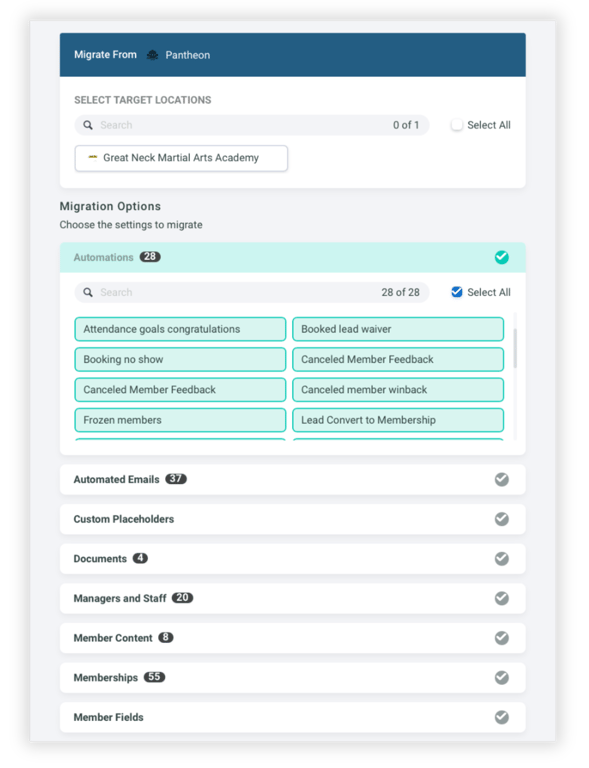
You can migrate a wide range of resources between locations to ensure consistency across your organization. This makes it easy to replicate automations, settings, and content without having to rebuild each item manually.
Resources You Can Share Between Locations
Automations • Automated Emails • Custom Placeholders • Documents • Managers and Staff • Member Content • Memberships • Member Fields • Products • Programs and Ranks • Skill Library • Schedule • Lead Capture Forms • Website Pages • Website Settings • Messaging Templates
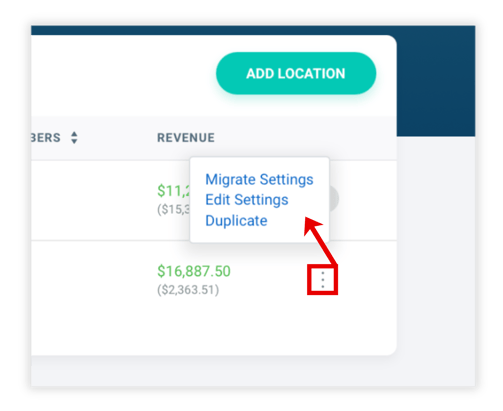
How to Migrate Resources to Another Location
From the Main Menu, click Franchise to open the Franchise Dashboard.
Click the [⋮] three-dot menu next to the location you want to migrate from.
Then, select Migrate Settings.
Choose your target location(s), then select the specific resources you wish to include in the migration. You can opt to transfer all categories with a single action, or expand each section to pick individual items—such as particular automations or membership types—based on your needs.
This allows you to share only the settings you want across locations — for example, you might copy your automations and memberships but leave website pages or documents unchanged.