
With Gymdesk, you can build a custom website for your gym that’s optimized for search engines and mobile devices. A free website is included with every Gymdesk account and works seamlessly with all the other features in your account.
Making a great first impression to online visitors can mean the difference between someone signing up with your gm or a competitor. Visitors will want to know:
-
What kind of training does the gym provide?
-
Who are the instructors?
-
What is the schedule?
-
Where is the location?
A Gymdesk website makes it easy for you to answer those questions. Additionally, you can create any kind of free-form content you like, such as information seminars, events, blog posts, articles about training and techniques, and more.
Click on any of the following links if you're looking for help on a specific part of the website, or keep scrolling down for more information.
Editing the Homepage
On the homepage tab, you can edit the contents of your homepage and customize its layout.
Adjusting the Header and Homepage Layout
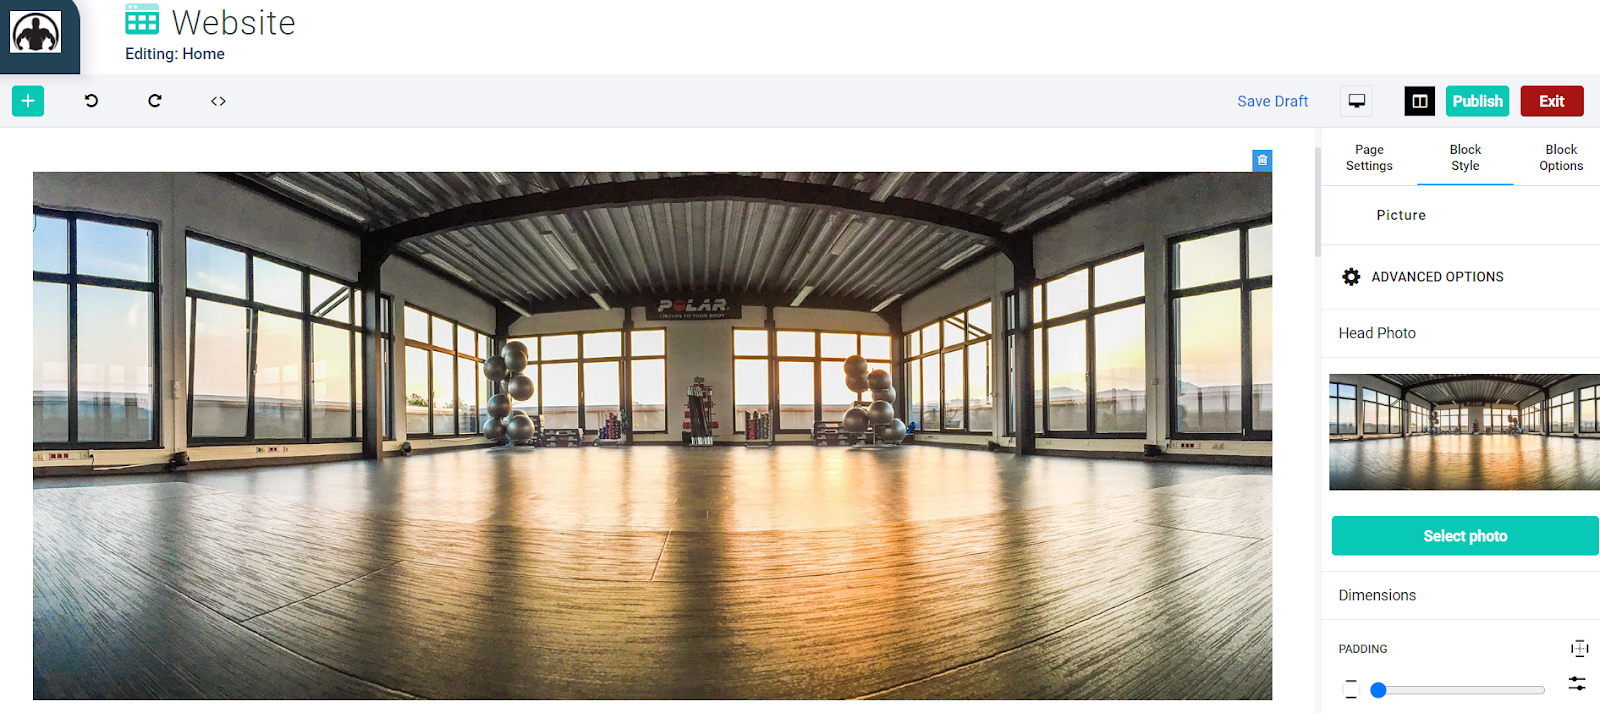
In the header section, you can click on the image to change the header image and adjust the padding, margin, and size.
You can also click on page settings to add a background image or color, and adjust the layout of the page from one of 3 layouts.
Using Content Blocks
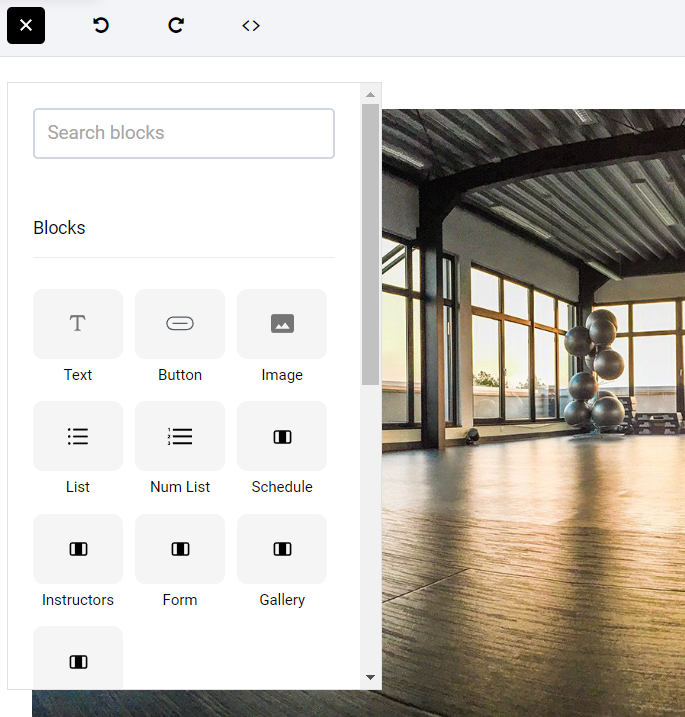
On the top left, clicking on the plus sign opens a menu that allows you to add different content blocks to the page. You can select from a wide variety of block types, including blocks that will automatically populate with your schedule, instructors, custom forms, photo gallery, and pricing.
In addition to content blocks, you can add layout blocks to add additional structure to your content.
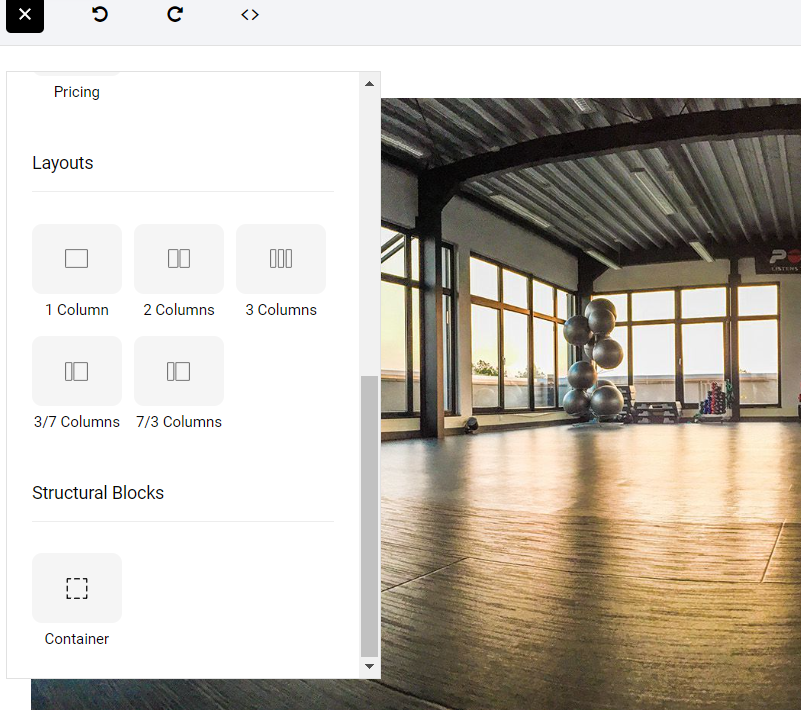
There are several common arrangements for you to choose from. Once you add a layout block, you can add content within each of the sections, such as text, photos, images, or buttons.
After adding a content block to the page, you can use block style on the right to make adjustments to fonts, padding, background, colors, and other settings. These options change depending on the type of element you’re editing.
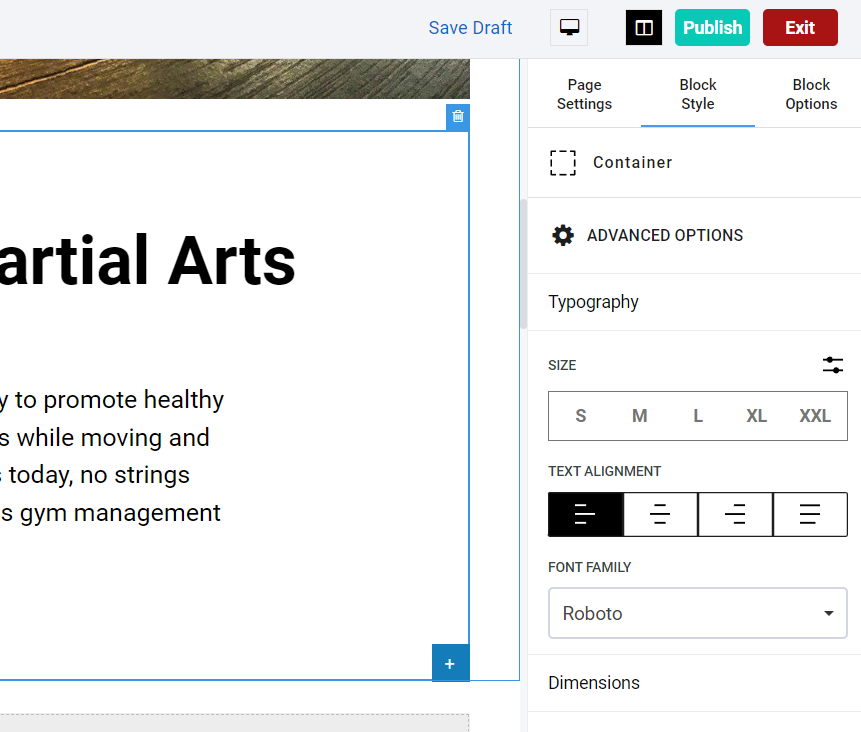
If you want to group multiple elements together, you can use a container block. After adding elements into a container, you can adjust them together by clicking on the container, then on block style.
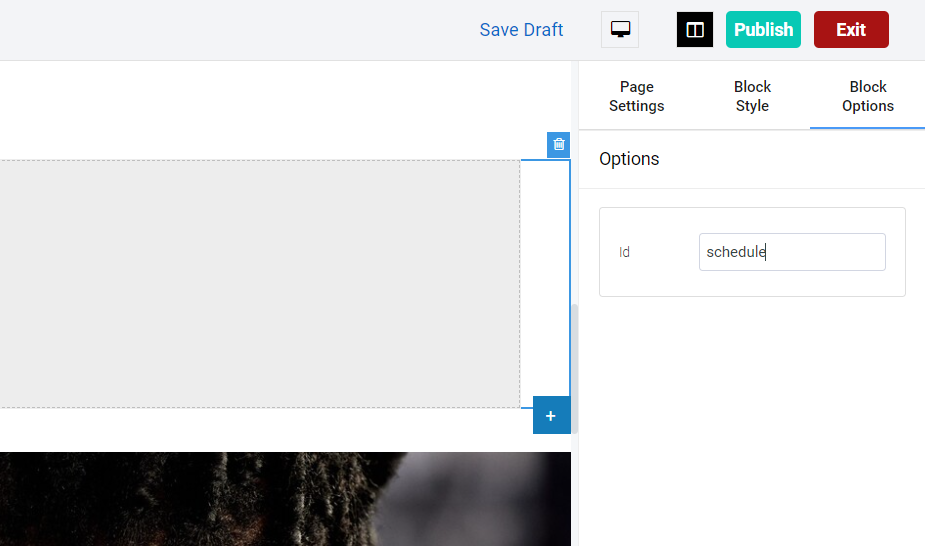
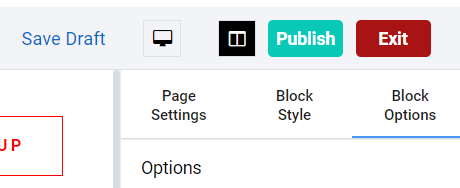
If you want to link to specific sections of your page, you can do so by adding a Block ID to a container. For example, change the block ID of a container to “signup,” then add #signup to the end of your page's URL to take a visitor directly to that section of your site.
Saving and Publishing Changes
On the top right, you can save your page as a draft without publishing your changes. You can also switch between a mobile and desktop view, or open your live site in a new tab. If you’re happy with the changes you’ve made to your site, click publish to make those changes live on your website.
If you exit the website builder without saving or publishing your changes, your edits won’t be saved.
Adding New Pages
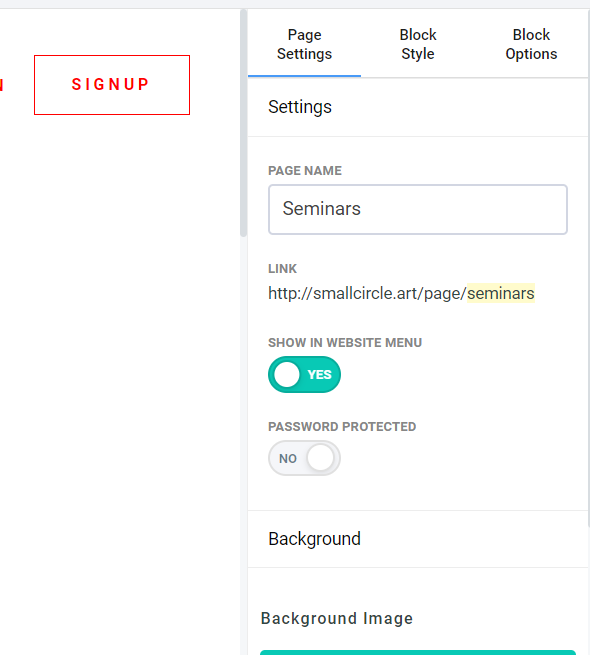
On the pages tab, you can create custom pages for your website.
In addition to the options you saw on the homepage builder, you’ll see fields for adding a page name and URL. You can also decide if you want to show the page in your website navigation or limit access to the page with a password.
Settings
In the settings tab, you can add a custom domain, change your Gymdesk domain (if not using a custom domain), and make other changes to your overall site settings.
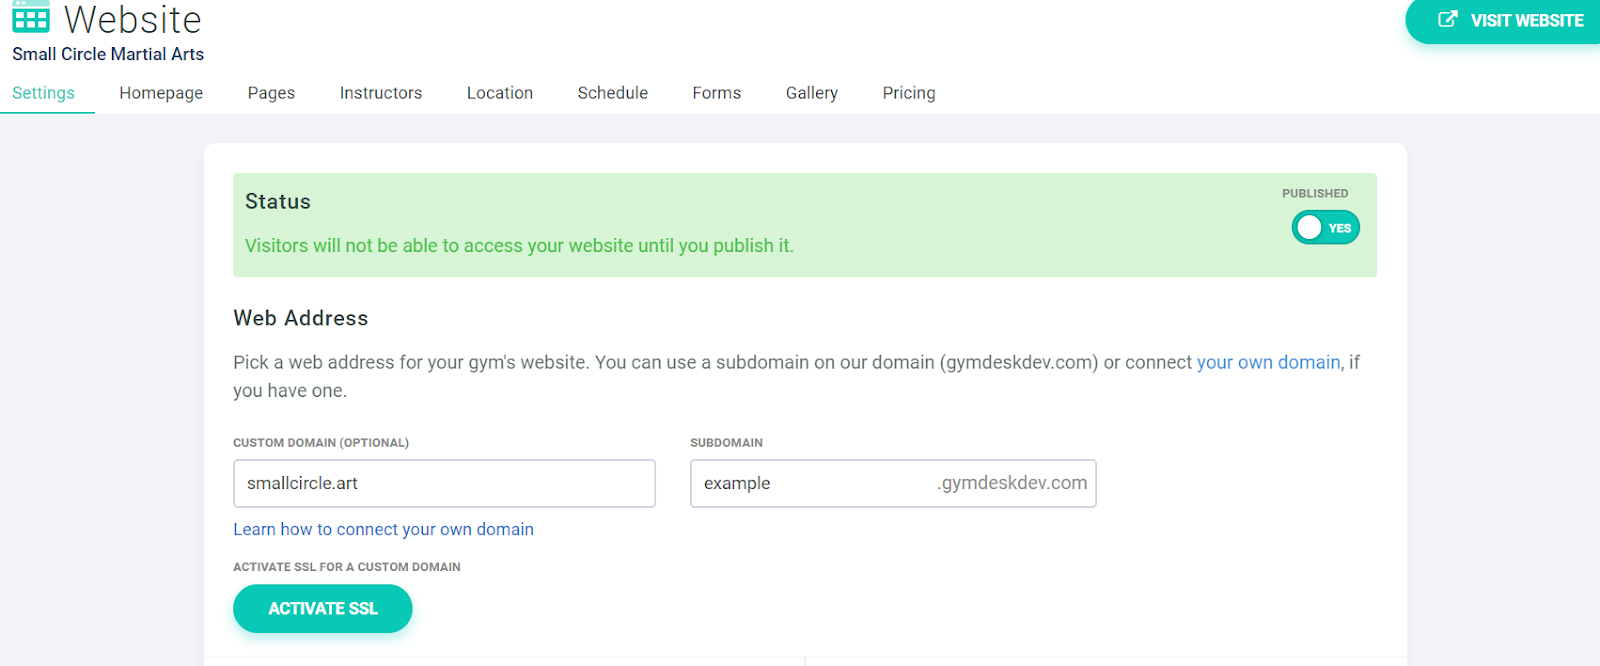
By default, your website is unpublished, and visitors won’t be able to find you online until you click published. There are settings you can adjust on this page.
-
Web Address: Change your Gymdesk web address, or add a custom domain. To add a custom domain, you’ll need to purchase the domain you want, then follow a few simple steps to link it to Gymdesk. If you set up a custom domain, you can activate an SSL certificate through gymdesk by adding a CNAME record in your domain provider then clicking “activate SSL” on this page.
-
Color Scheme: Change the overall look of your website by choosing between a dark or light theme and by customizing the colors of your website’s font and other elements.
-
Website font: Choose from 5 different fonts for your website.
-
Website Logo: Choose which logo to display on your website. Your website will use your gym’s logo by default, which you can update in your gym settings. If you like, you can upload a different logo here to use on your website.
-
Social Accounts: Add social media accounts for Facebook, X, YouTube, and Instagram. These will be displayed on each page of your site in the footer. If you'd like to embed a social media feed into your website, follow the steps from each provider:
-
Website Navigation: customize your website’s navigation by adding, removing, and reordering links in the website header. Up to 6 links can be displayed in your header. Any additional pages you publish will be displayed under a dropdown menu titled “more.” When enabled, the login and signup links will always be displayed in the top right corner of your site.
-
Tracking and Analytics: add your Google Analytics measurement ID if you’d like to connect your Gymdesk website to your Google analytics account. Additional tracking codes for services such as Facebook's Meta Pixel, which is used for tracking visitors for ad performance purposes, can be added in the <head> and <body> script sections below your Google Analytics measurement ID. Please refer to the instructions for additional tracking scripts to determine if they should be added to the body or head tags of your website.
Instructors
In the instructors tab, you can edit how the gym’s coaches and instructors are displayed on your site. The instructor information on this page is pulled from the staff settings in your account.
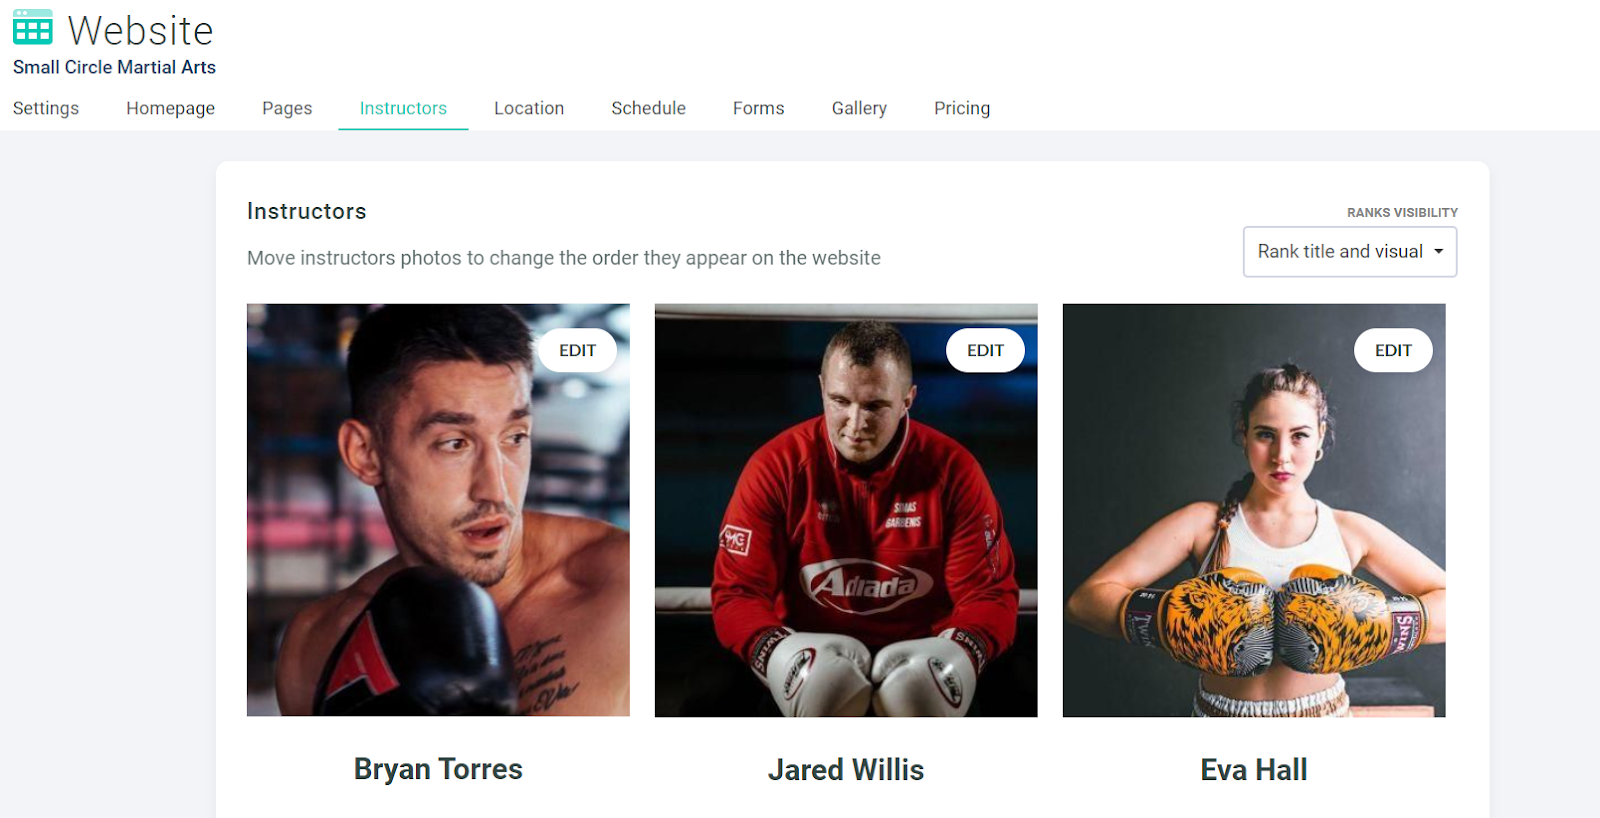
On this page, you can change the order of your instructors by dragging and dropping them. You can also choose to display information about their rank and title.
Location
On the location tab, you can adjust how your gym’s address and map location is displayed. Your gym’s address is pulled from the settings section of your account under general information.
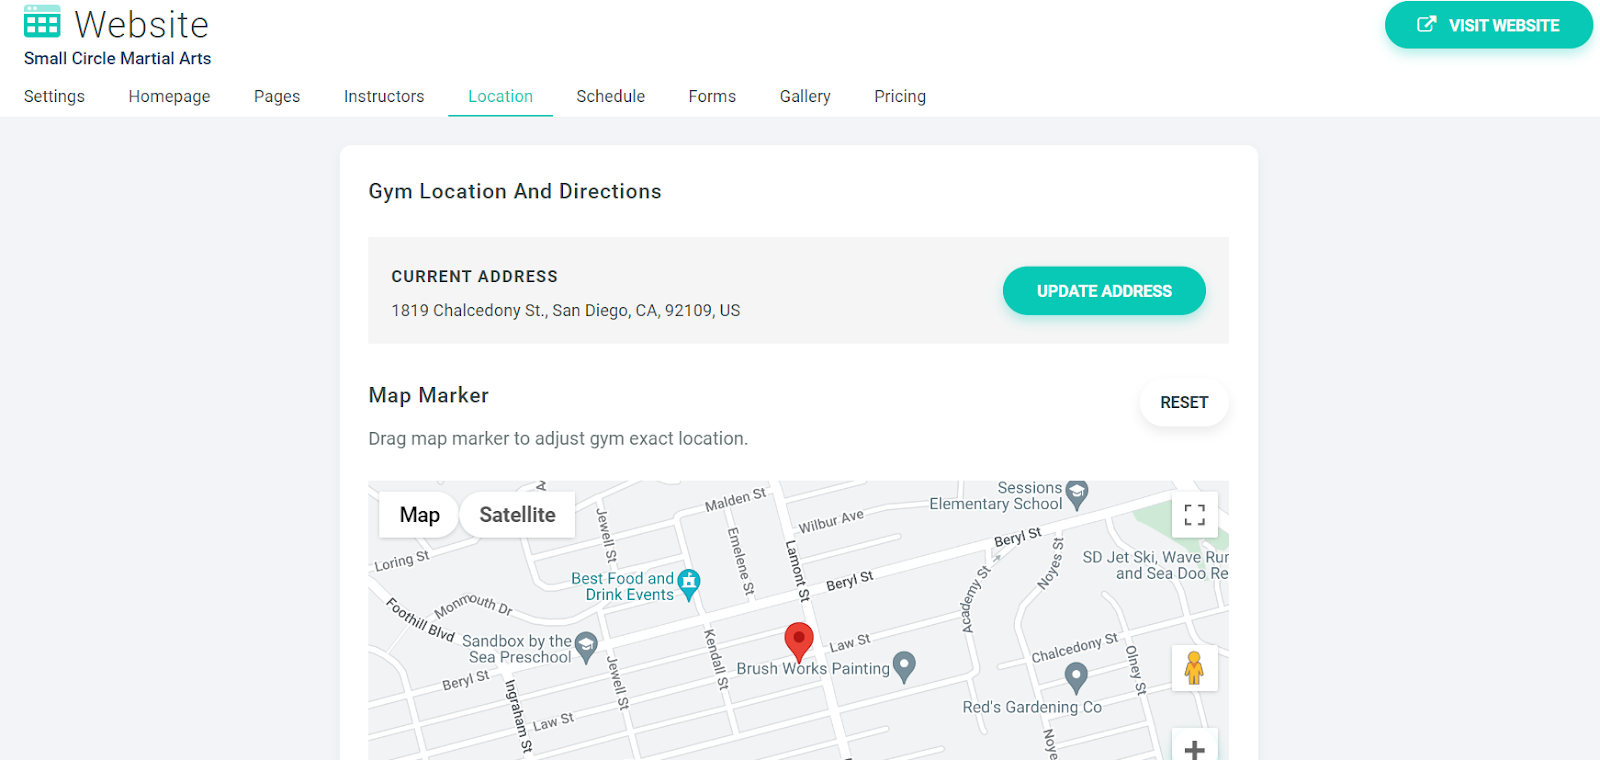
Toggling link directly to Google Maps listing allows you to link to your address on Google Maps when someone clicks the map on your website.
You can use the box at the bottom of the page to add additional directions and relevant information, such as parking instructions, that will be displayed below your address and map location.
Schedule
On the schedule tab, you can add extra information about your class schedule, such as class descriptions and requirements. You also have the option here to display canceled classes or hide them.
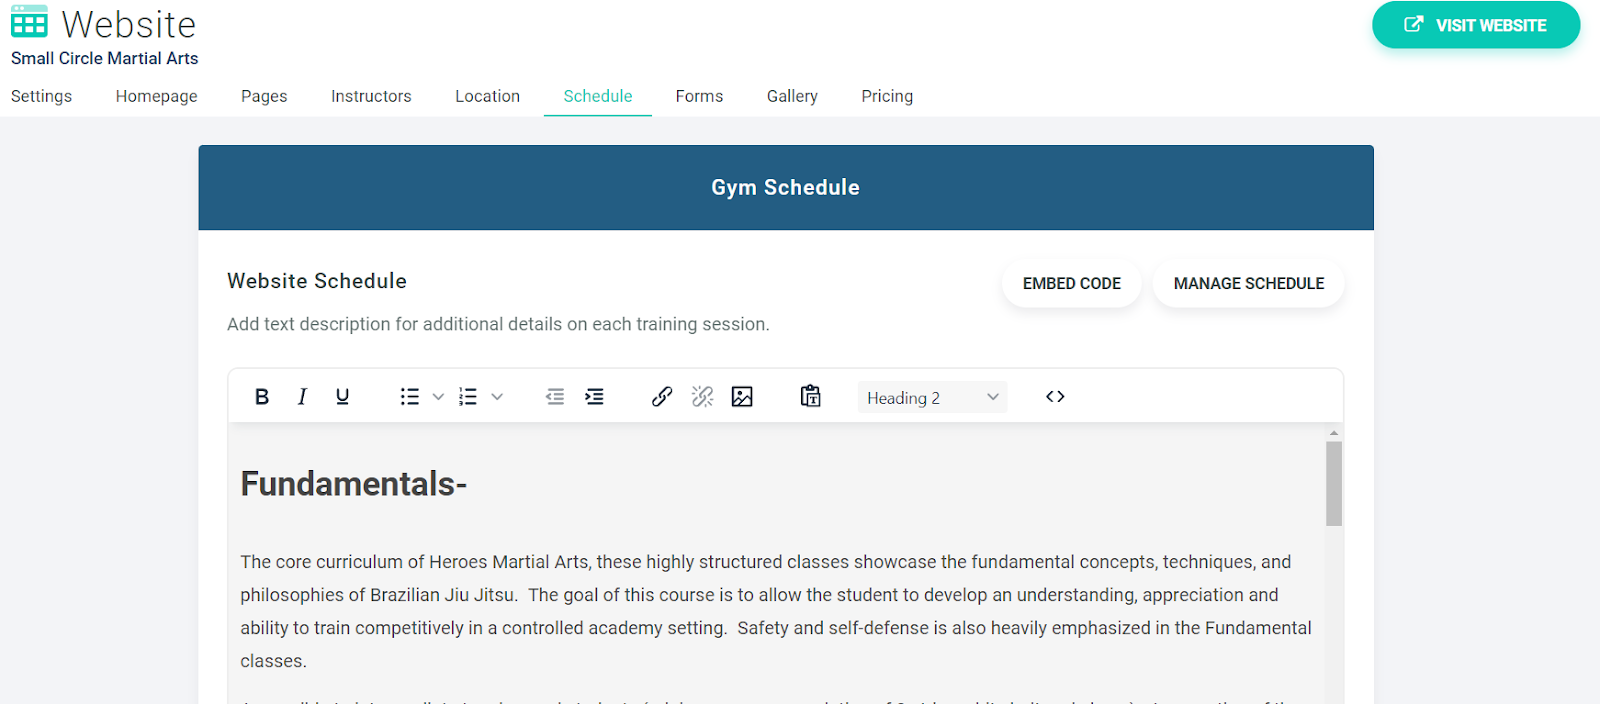
If you’d like to edit your gym’s training schedule, click manage schedule to be taken to the schedule settings in your account.
You can embed your schedule on an external website as well, by clicking on embed code. Follow the instructions on the page to add the schedule to your website.
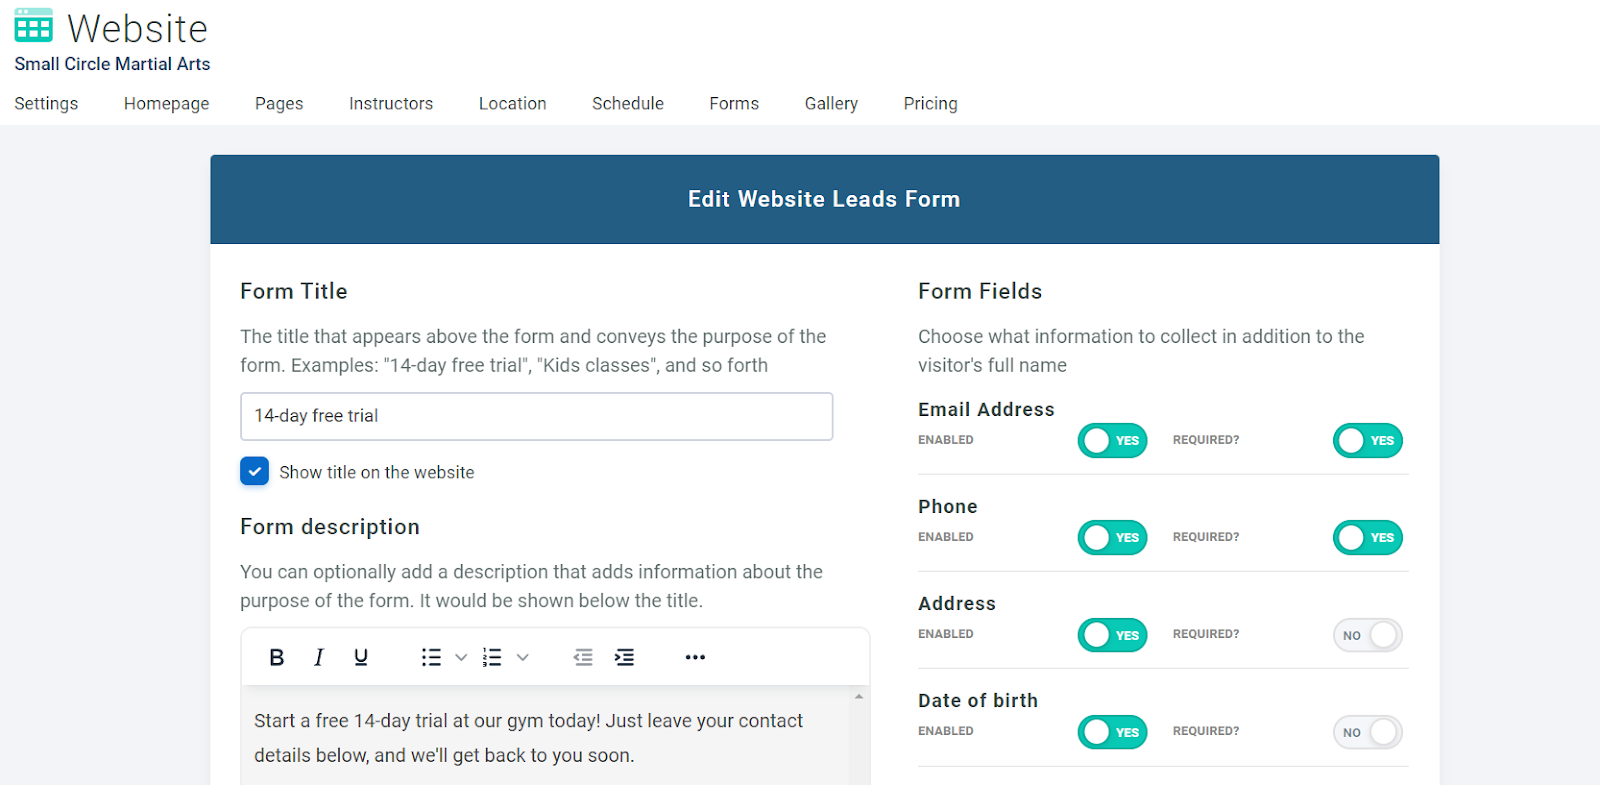
Forms
On the forms tab, you can create forms for your website to collect information from website visitors. You can also embed forms you’ve created on Gymdesk to an external website by clicking on embed code. Follow the instructions on the page to add the form to your website.
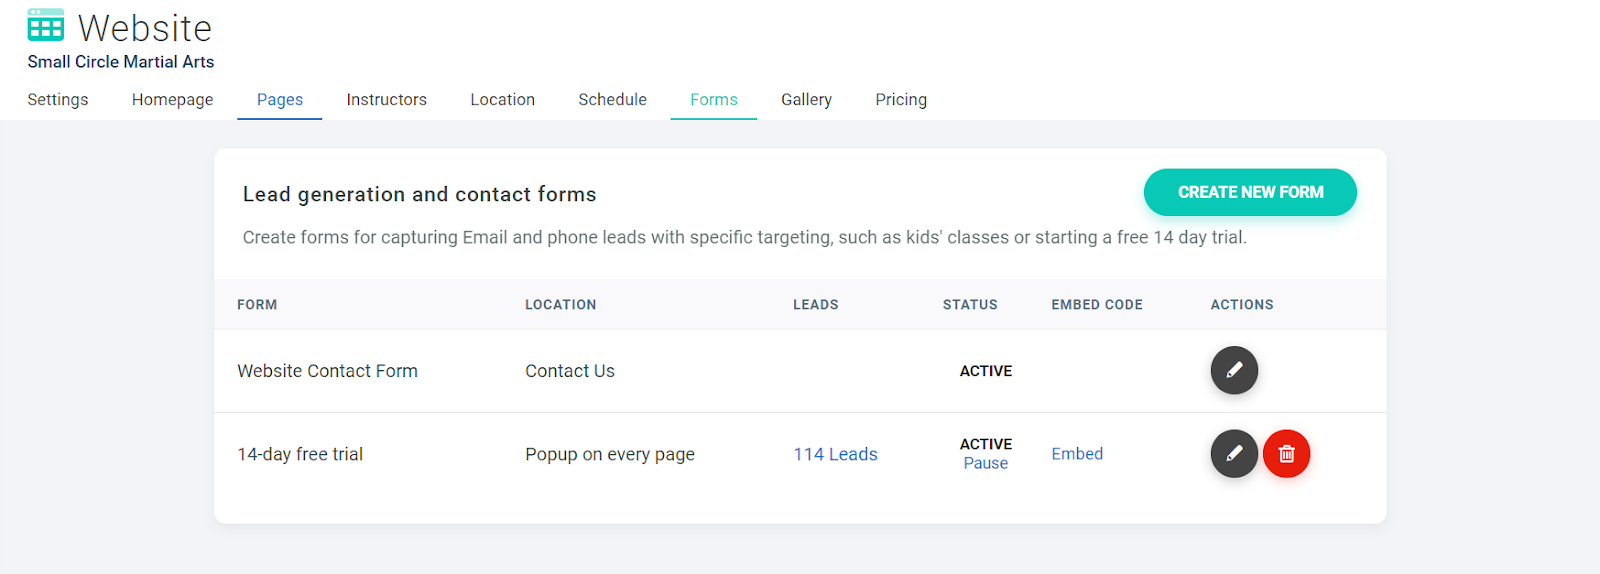
By default, you have a simple contact form that you can display on your website. You can also create any kind of custom form you like for gym promotions, trial memberships, and other offers that will incentivize your visitors to learn more about your gym.
Create a custom form by clicking create form. Within the form, you can adjust a wide variety of settings.
-
Form title: The title that appears above the form on your site. You can choose to hide this title.
-
Form Description: A description of your form that’s shown below the title.
-
Form Fields: Information that you want to collect within the form. You can also enable a captcha here to prevent spam signups.
-
Additional Fields: Custom fields you’ve created in your account, such as experience level or fitness goal. You can adjust these fields in the marketing settings section of your account under custom lead fields.
-
Button Text: Change the text displayed on the submit button.
-
Source: How the submission will be categorized in the leads section of Gymdesk’s marketing dashboard.
-
Thank You Message: Text that’s displayed after the form is submitted.
-
Redirect URL: An optional URL to redirect a visitor to after the submit a form.
-
Show Form: Where you’d like to display the form on your website. If you select “ for implementation into website,” you’ll be able to add the form into a content block within your site.
-
Conversion Snippet: Embed code from external software you’re using, such as Google Ads, to track form submissions and conversions.
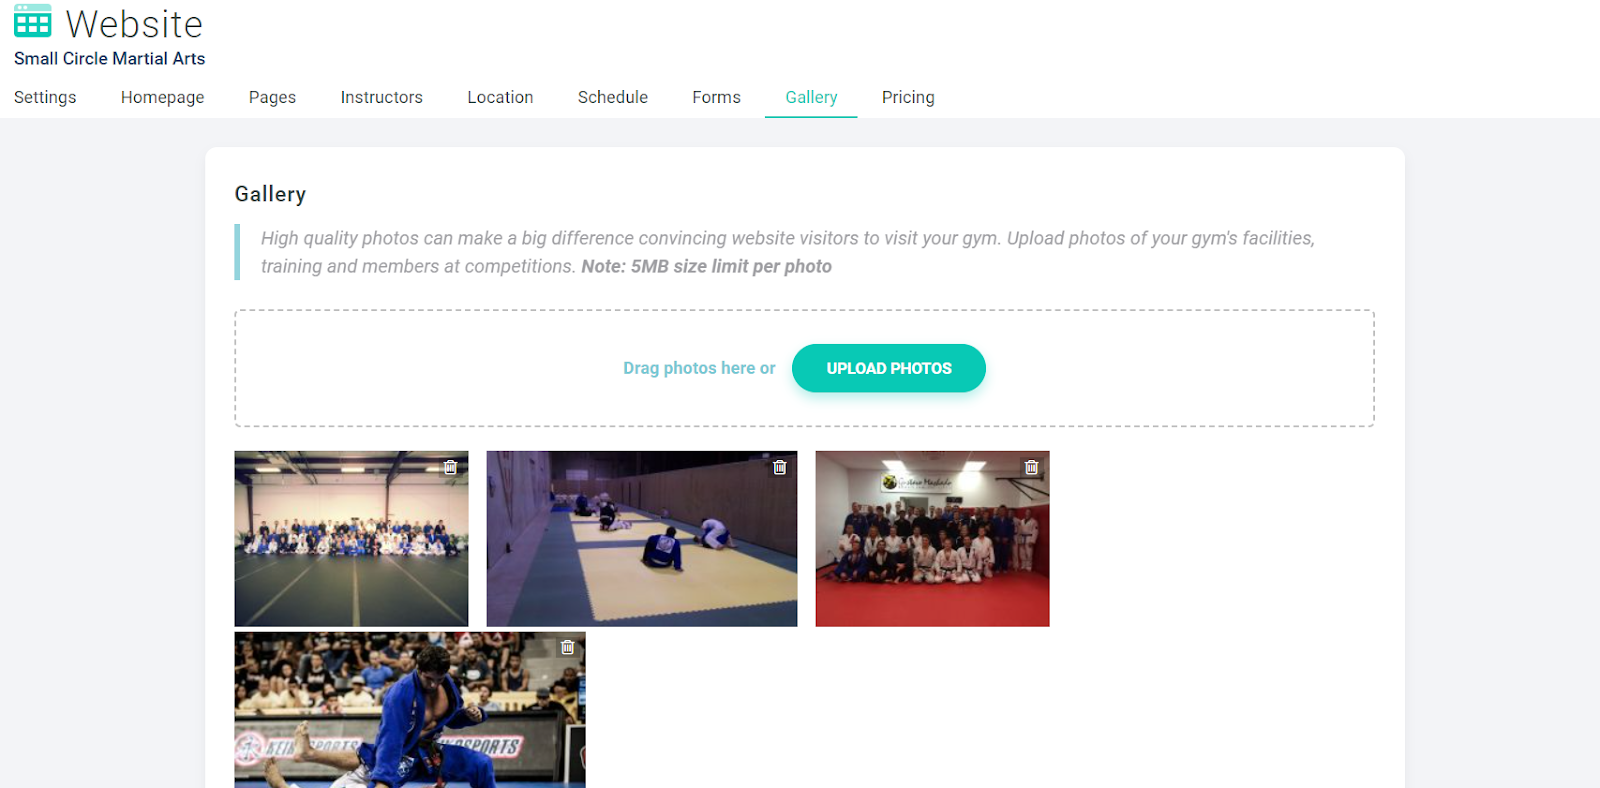
Gallery
In gallery, you can add any photos you’d like to display within the gallery content block on your site. To reorder how your images are displayed, simply click on an image, hold the mouse button, then drag it to where you'd like to place it.
Pricing
On the pricing tab, you can display pricing for the membership options that you’ve set up for your gym.
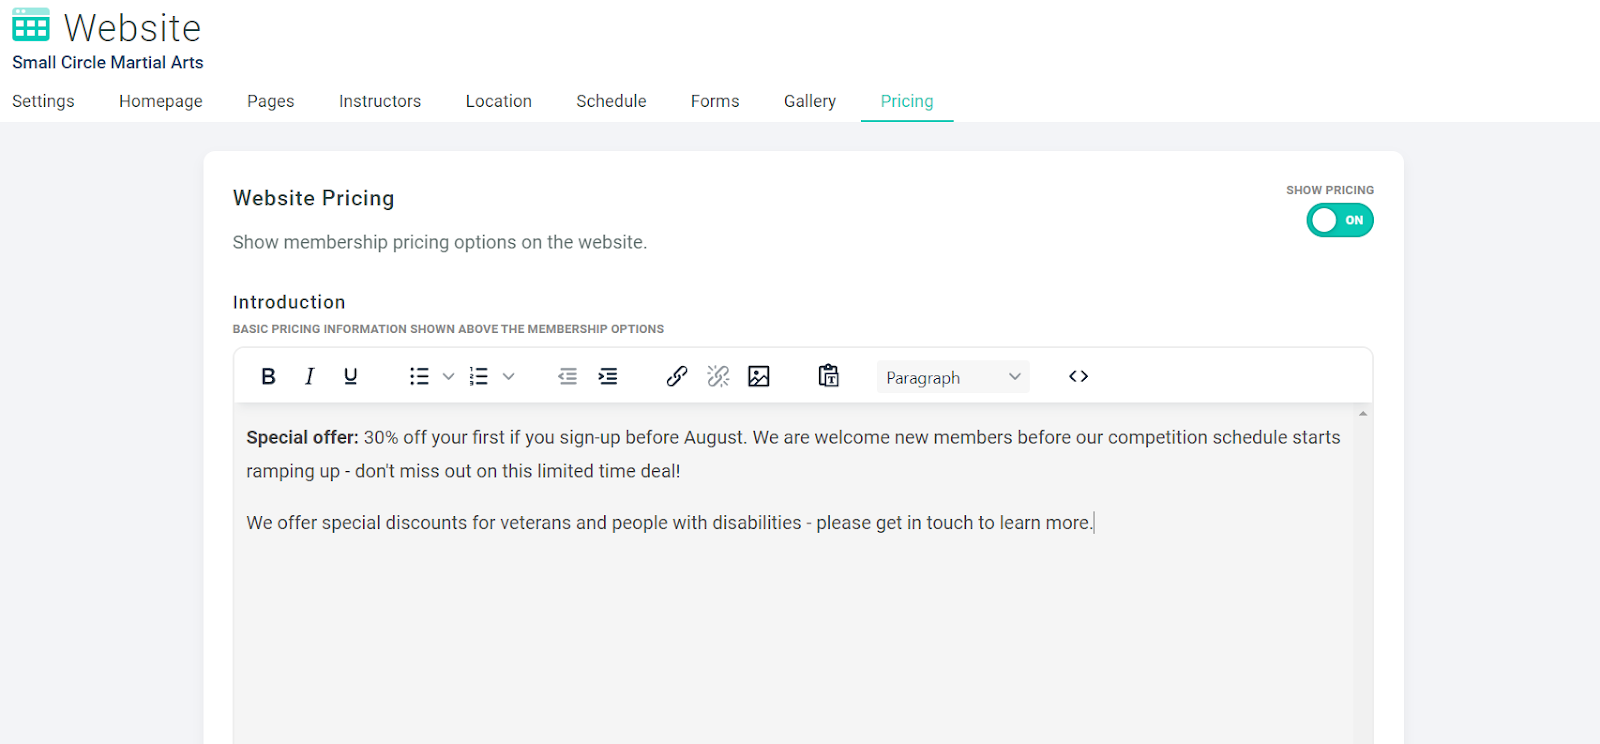
There are a few settings and fields here that you can adjust:
-
Website pricing: Choose to display or hide pricing for your memberships.
-
Introduction: Add introductory text that’s displayed before your membership options
-
Add pricing options: Choose which memberships you want to display. To reorder how your memberships are displayed, simply click on a membership type, hold the mouse button, then drag it to where you'd like to place it.
-
Additional information: Add text that will be displayed after your pricing options.