
Setting up your gym billing
Before setting up membership pricing and optionally accepting payments via payment cards, we should go over our account billing settings and make sure we have everything in order.
There are several options you can change to customize how payments are handled at your gym.
Currency
You can choose your currency from over 135 supported currencies. Note that some currencies are not accepted by MasterCard (denoted by *).
Email Notifications
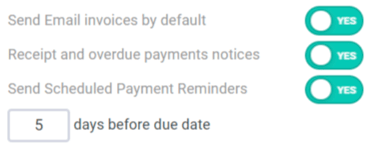
- Send Email invoices by default
When setting up a membership payment, you can pick whether or not an Email invoice will be sent (this applies to recurring payments as well). This setting determines what is the default setting (send or don't send). You can change this on the payment creation screen as well. - Receipt and overdue payments notices
This setting determines whether to send Email receipts for successful payments, and overdue notifications for payments that failed to process (if set up with a payment card), or are past due (for manual payments). - Send Scheduled Payment Reminders
You can turn on automated Email reminders for scheduled payments, that are set a specific number of days before the payment is due. This can be useful to help members make sure they have enough funds on their payment card, or in the case you are required to provide this notification by law. You can also set the number of days prior to the payment date the notification will be sent at.
Retrying Failed Payments
You can instruct the system to automatically retry failed payments - two, four and seven days after the original payment date. Retrying failed payments a few days after can sometimes result in a successful charge, especially if the member addressed the reason the payment failed originally (such as adding funds, or updating payment information).
Manual Recurring Payments
Typically, recurring payments will be set up and managed through the membership options (which you'll set up next if you haven't already).
Turn on this setting if you would like to add and manage recurring payments directly in addition to memberships.
Daily Payment Report
We will send you a daily Email report that shows what payments were due that day, how many were paid on time, how many failed processing (for payment card payments), and how many manual payments are now overdue. You can turn it off with this setting if you do not wish to receive this Email.
Scheduled Payments Processing Time

You can change the time of the day at which automated payments run.
- Auto-pay - the time at which credit card payments and direct debits will be processed.
- Manual payments - the time at which manual payments will be marked as overdue if not paid yet.
Note that those times are when your payments will be entered into our processing queue. The queue can take some time to process, and so the payments might not process at the exact minute, but within 20-30 minutes of it (up to 1 hour).
Tax Settings
You can set a tax rate to apply to all payments or just product sales. The actual tax collected can still be adjusted for each individual payment. You can also customize the invoice label the tax would appear under (default is "Tax", but can be the actual tax title used in your region).
You can set up two individual tax rates, if required (for example Canada has both PST and GST taxes in certain areas).
Tax can be added on top of the total amount (exclusive tax), or as part of the invoice amount (inclusive tax). Whether you need use one or the other depends on the taxation laws in your country.
Apply tax retroactively to existing payments
![]()
Any changes you make to your tax settings will not affect payments already created (to avoid accounting issues). You can apply it retroactively to any scheduled payments previously created that have not been processed yet. By checking the box above before saving your settings, your new tax settings will apply to those payments.
Connecting a Payment Processor
We provide payment processing through our payments partners. This provides increased security (we never store payment information directly), and allows you to retain your members' payment information in case you decide to switch to a different software system.
If you have an existing account with one of our payment partner, pick that option and click on the "Connect" button to authorize our platform to process payments for you.
Otherwise, you will need to create a new account - both Stripe and Square allow you to quickly start processing payments without opening a merchant account. Stripe also provides direct debit (bank transfers / ACH) in the US, Pre-authorized debits in Canada, BECS debits in Australia and SEPA payments in the EU.
Authorize.net allows you to use your existing merchant account, so if you have one and would like to keep using it, you might opt to use Authorize.net. Friendly Payments is our Authorize.net partner, and is able to offer lower rates for US customers compared to the other processors.
One you have an Authorize.net account, you'll simply need the API Login ID & Transaction Key provided by your payment processor and you can enter these under Settings -> Billing -> -> Payment Processing.

If you have any questions regarding payment processing, feel free to drop us a line!
Connecting a Card Reader
If you use Stripe or Square as your payment processor, you can use their hardware to process cards instead of keying it in.
- Stripe provides the BBPOS WisePOS-E (requires log-in)
- Square provides the Square Terminal card reader. Note: The Square Terminal is a specific device and the only one compatible with this integration. Other Square devices (such as the Square Stand, Square Register, etc, are not compatible).
To connect a reader, go to the billing settings screen, and click on "Connect reader" button at the bottom, next to your selected processor.
Stripe Terminal card readers are supported in multiple countries outside the United States, including:
•UnitedStates •Canada •Australia •Austria •Belgium
•Czech Republic •Denmark•Finland
Available reader models and supported features may vary by country and local regulations.

Follow the instructions on the next screen to connect your reader, and you'll be able to accept cards through the point-of-sale feature.